
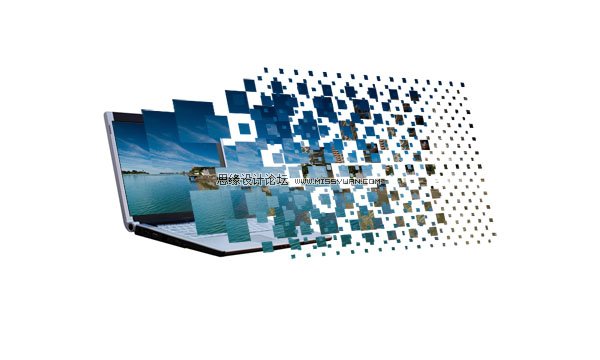
Step 12:
You should still have your original photo layer, as it was duplicated for safe keeping near the start of the tutorial. Duplicate the layer again, and move it so that it is the first layer above your laptop image layer. Then go to edit>transform>distort and fit the photo nicely over the laptop screen. Then hide all of your vanishing point guidelines and make sure that all of your checkerboard photo layers are visible. Seeing as all these layers are within the same layer set select the layer set and drag it to make the graphic more central in your document.
12. 打开我们之前备份的photo原图,复制图层,变换其大小后紧贴笔记本屏幕。
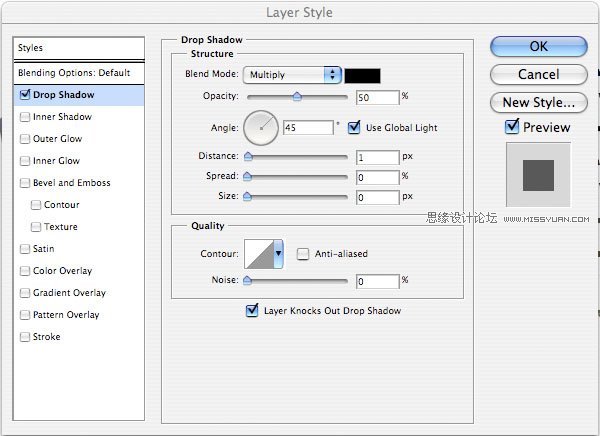
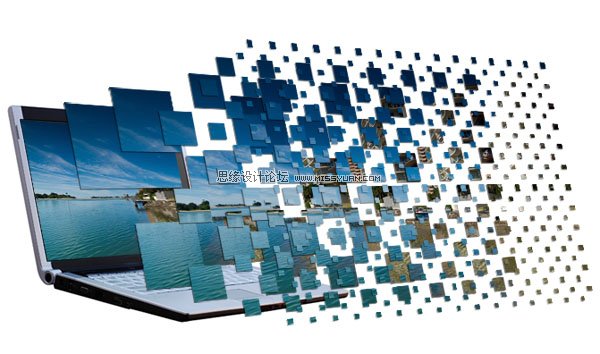
Step 13:
Right click on one of your photo squares layers and click blending options. Apply the drop shadow settings shown below. Then once this has been applied right click on the drop shadow shown in your layers palette, select ‘copy layer style’ and paste the layer style to all of your other photo squares layers. The outcome is shown below:
13.为photo图层添加图层样式:投影参数设置如下:
技巧:为一个图层添加样式以后,右击”复制图层样式“,然后把图层样式粘贴到其他图层上,这样可以为图层快速添加图层样式。
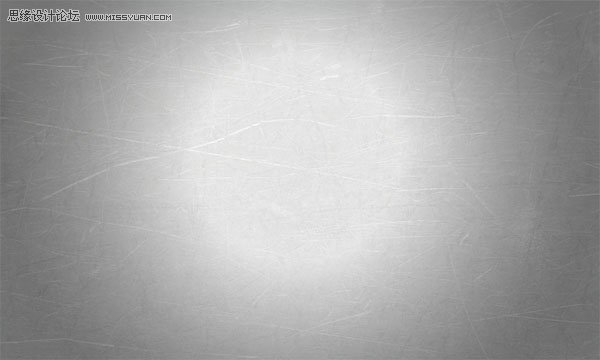
Step 14:
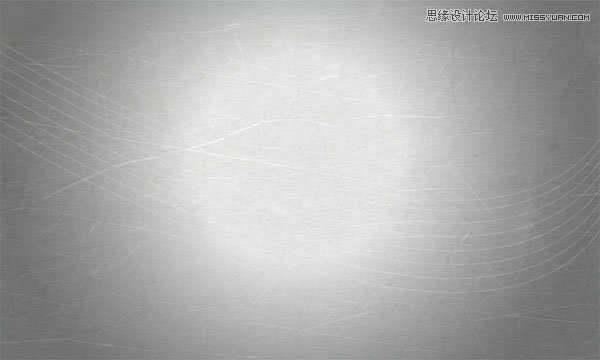
Now create a new layer set below your laptop/photos layer set called ‘background’. Hide your laptop/photos layer set. Create a new layer and fill it with a white to light gray radial blur.
14.新建文件夹命名为”backgroud“。
隐藏其他图层,创建镜像渐变如下图。

Step 15:
Paste a metal texture onto a new layer above your radial gradient layer and reduce it’s opacity to 20% for a subtle textured effect.
15. 粘贴纹理图片到舞台,置于”background“上方,降低不透明度为20%。
Step 16:
Now create some bendy lines across your background using the pen tool. Be sure to have a white 1px brush selected and then once you have created your bendy pen line right click on it and select ’stroke path’. Then simply duplicate your line layer until you have multiple white lines across your background. I merged all of my line layers together and reduced the merged layer opacity to 30% for a more subtle effect.
16.使用钢笔工具创建一组1px白色的纵贯背景宽度的曲线。
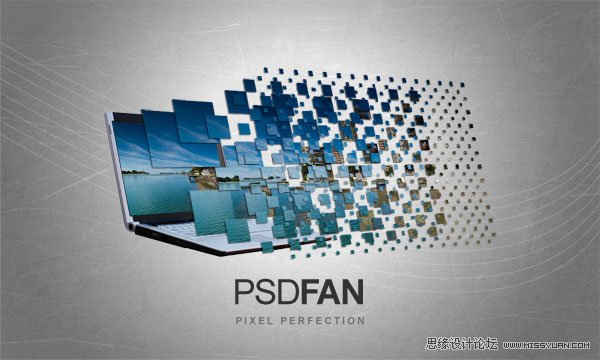
And we’re done!
To finish things off I added some cool text. Click the image below if you want the full sized version.
这是我们最终的结果。
零七网部分新闻及文章转载自互联网,供读者交流和学习,若有涉及作者版权等问题请及时与我们联系,以便更正、删除或按规定办理。感谢所有提供资讯的网站,欢迎各类媒体与零七网进行文章共享合作。

