
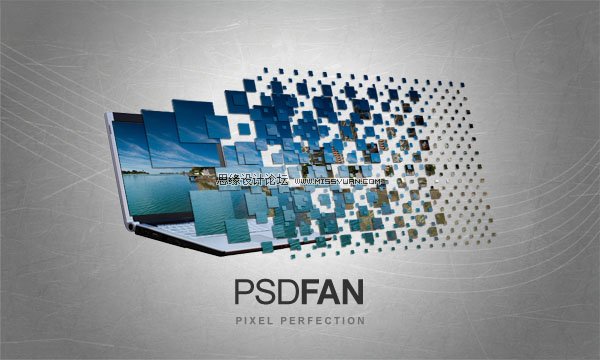
本例的最终效果:
Step 1:
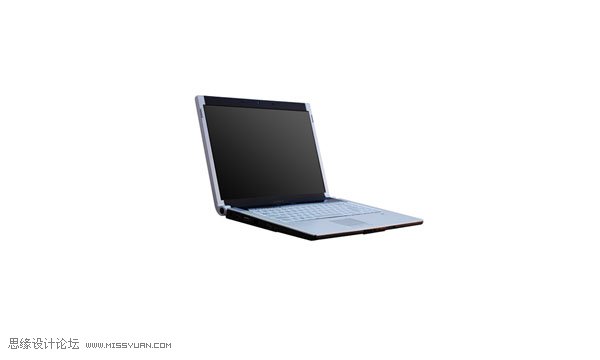
Open up a new document 1000px wide and 600px high. Then paste an image of a laptop into your document. Create a new layer set called ‘laptop’ and put the layer containing your laptop image into this layer set.
1.新建宽1000px、高600px的新文件,把笔记本电脑的素材图片导入舞台,然后将其所在文件夹重命名为“Laptop”。
Step 2:
Now I want to create a vanishing point for the screen of the laptop. Many Photoshop users, including myself, don’t yet have Photoshop CS2 or CS3, so this tutorial won’t utilize the useful vanishing point filter available in these versions. Instead, we’re going to manually create a fake vanishing point.
2.鉴于很多读者并没有将ps软件更新到CS2/CS3,所以我们将用手工制作屏幕的消失点。
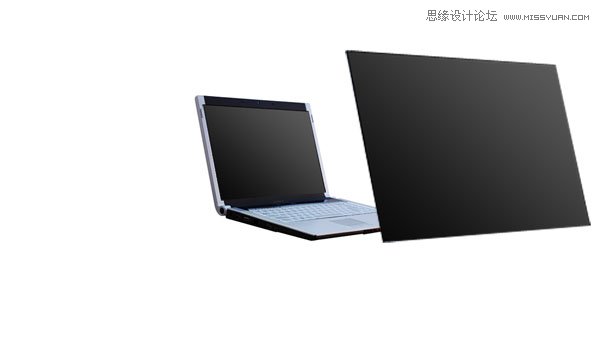
Select the screen part of your laptop using the lasso tool. Then copy your selection, create a new photoshop document, and paste in the selection. Go to image>image size and double whatever your image size is. In this case the original screen was 204px wide, so I simply doubled this to 408px.
使用索套工具取得笔记本电脑屏幕选区,Ctrl+C复制,然后新建图层并粘贴,然后将其扩大一倍。
本例屏幕宽度204px,我们把它扩展到408px。
Then paste this new larger screen back into your original document. Positioning it roughly where you think it looks good in terms of perspective.
我们重新摆正扩大后屏幕的位置如下图所示:
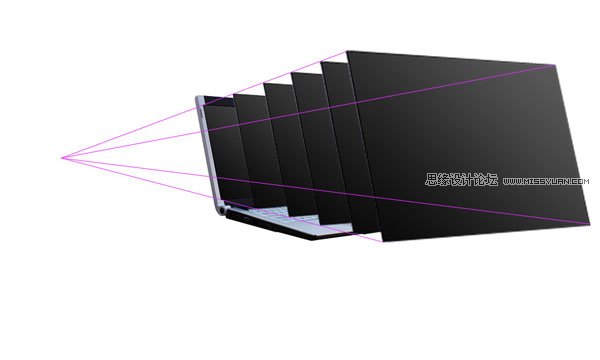
Step 3:
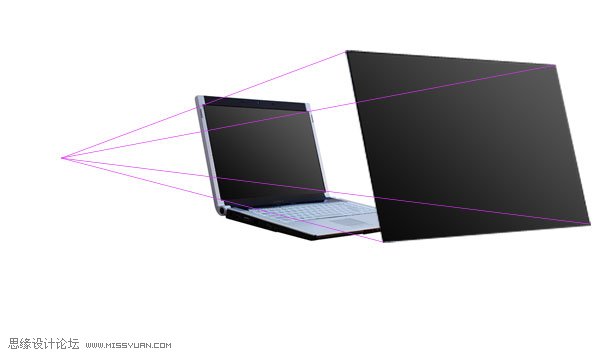
Now select your line tool and a nice bright color for it and draw lines each corner of your large screen through to the matching corner of the original screen and past to a vanishing point. Do this with each corner of the laptop screen, until you have something like the image below:
3.我们来使用亮色创建参考线,沿两屏幕的对应点绘制,知道4条先汇聚于一点。
Step 4:
Now duplicate your larger laptop screen and select edit>free transform. Then in the menu near the top of your screen (see diagram below) change the W (width) and H (height) percentages from 100% to 90%.
4.复制图层,自由变换,大小调整为原尺寸的90%。
![]()
Move this resized image so that it matches up with the perspective lines that you created earlier. Be sure to place this resized screen layer behind the largest screen layer but above your original laptop photo layer.
Repeat this process of duplicating/resizing/aligning using the resizing percentages of 80%, 70%, and 60% from your large screen layer. Remember that your original laptop photo is 50% of this large screen layer.
This is how your image should look after you have created this new screens and lined them up correctly:
使用相同的办法依次创建,80%、70%、60%这三个新图层。
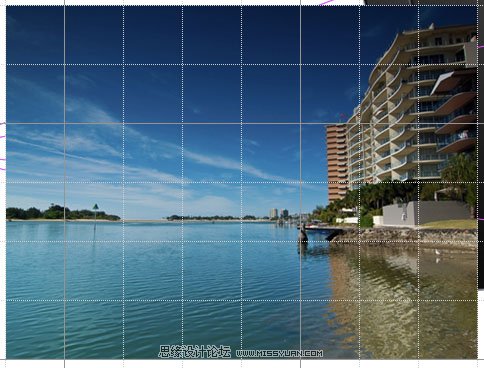
Step 5:
Now create a new layer set called ‘photo 1′. Paste in the image that you want to manipulate. View a grid over your image and then use the free transform tool to resize your photo to fit nicely into the grid squares. Make sure that the photo fits into an even number of grid squares for it’s height and width. In this example the photo is resized to be 8 grid squares wide and 6 high.
5.新建图层,命名为“photo1”,把我们要操作的图片素材置入,显示网格。
使用自由变化工具,调整图片贴合网格,本例刚好是8个网格宽、6个网格高。
零七网部分新闻及文章转载自互联网,供读者交流和学习,若有涉及作者版权等问题请及时与我们联系,以便更正、删除或按规定办理。感谢所有提供资讯的网站,欢迎各类媒体与零七网进行文章共享合作。

